The agricultural tensiometer is a sensor used in agriculture to measure the effort that the roots must make to extract moisture from the soil.
An agricultural tensiometer has three parts:
A hollow cylinder
A porous capsule
A vacuum gauge, which shows the tension inside the cylinder
The agricultural tensiometer helps to save water. To understand how this saving is made, a comparison can be made of moistening the soil with the absorption of water by a sponge. The sponge only retains a certain amount of water, absorbing it in a few seconds. If it is placed under a tap for an hour, more water cannot be absorbed or held for longer. This is similar to soil. Although soil takes longer to absorb water, the principle is the same. Any excess water that is applied is wasted by seepage or evaporation.
Probably the greatest water saving obtained from using agricultural tensiometers comes from saving unnecessary or excessive irrigation. Many farmers find that they had been over-irrigating certain areas while under-irrigating others. Correcting these situations results in surprising water savings.
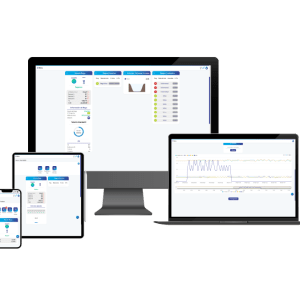
The Maher APP can record the readings from the sensors so that they can be viewed very intuitively. With Maher Smart, Ferti 8000 and Ciclón, irrigation can also be scheduled on demand based on the value recorded by the tensiometer.
The agricultural tensiometer works filled with water. By introducing the ceramic part to the depth at which the measurement is to be taken, the water inside the cylinder is captured by the soil, generating a suction inside the cylinder that is measured by the vacuum gauge. The pressure measured by the vacuum gauge is what the root must overcome to capture water from the soil.
The tensiometer indicator is graduated from 0 to 100, where each unit represents one hundredth of atmosphere. The unit of measure is centibar or kilo pascals.
Values close to zero indicate saturated soils. These values are usually given after periods of intense rain or after irrigation.
Between 10 and 20 centibar indicates that the soil is in field capacity. When the permissible depletion level is reached, irrigation must be applied. It depends on the soil type:
Sandy soils: this value is between 20 and 30 centibar
Loamy soils: between 30 and 50
Clay soils: between 50 and 70 centibar
Higher values indicate water scarcity
When applying irrigation, the phase the crop is in must be taken into account. For example, when the plant does not have fruit, it may require more water than during the fruit setting or swelling phase. The advice of an agronomist is recommended for correct use.
Agricultural tensiometer maintenance
Change the water in the tank and add algaecide as it is consumed.
Expel any bubbles using the membrane at the bottom of the vacuum gauge.
Correctly store the tensiometer monitor when not in use. For temporary storage of a few weeks, it is recommended to clean the outside of the ceramic tip with a damp towel and submerge it in a bucket of distilled water.
Installation
The agricultural tensiometer must be installed in such a way that it offers reliable information on the entire farm. That guarantees its control and enables optimal irrigation decisions to be made based on this data.
They must be installed in representative places of the crop area. The number of tensiometers to install depends on the different variations, such as the type of crop, water filtering through the soil, temperature, etc.
General advice for installing agricultural tensiometers
Row crops: two tensiometers in a row. One in the center of the root zone at around 30 cm for most arable crops and another at about 60 cm deep to control any losses in depth.
Woody crops: three tensiometers are recommended. At 30, 60 and 90 cm deep to have a clear idea of the evolution of the bulb.
Necessary material: Tensiometer, bucket, distilled water, syringe, mallet and pick.
Steps for installing the tensiometer monitor
Place the tensiometer in a bucket with distilled water the night before installing it. Be careful not to touch the ceramic tip with your hands. Keep the ceramic tip moist until installation.
Make a hole with the stake and mallet for inserting the tensiometer at the depth at which the measurement is to be made.
Insert the tensiometer into the hole having previously removed the lid on the water tank. Make sure there is contact with the ground.
Fill the tensiometer tank with distilled water and algaecide using the syringe. Press the membrane at the bottom of the vacuum gauge to expel any air bubbles. Once the tank is filled, place the lid on it.
Frequently asked questions
The instruments always mark zero:
The soil is saturated due to irrigation, rain or poor drainage.
The instrument has no water or has lost suction due to low water level in the pipe. Fill the tensiometer.
Check the gauge calibration and fill the gauge (the gauge needle should read 80-85 for R and SR gauges and less for LT and MLT, after applying vacuum with the hand pump).
The instruments need frequent water service:
Generally this indicates lack of irrigation, if the tensiometer readings remain high for a period of several days.
Other occasional causes can be:
Incorrect installation. The ground is not adequately tightened around the instrument.
Leaks from the cover joint. If the rubber stopper has hardened, it must be replaced.
Leaks at the pressure gauge connection point.
The instruments respond slowly to the manometer:
Normally, this is due to a slow infiltration rate depending on the soil type. Make sure that the instruments are filled with algaecide liquid and free of air.
The ceramic tips are partially clogged by salt formation.
The gauge movement is erratic due to minor damage. Lightly tap the gauge before taking readings. If the tensiometers have several years of use or if the tips have dried out by frequently removing them from the ground. Reconditioning is recommended.
Large variations in the scale of change of instrument readings:
This is usual. Almost all new users discover surprising variations in soil moisture values in different areas, due to topography and different types of soil. An adequate number of instruments must therefore be used to ensure effective irrigation control. Attempting to control irrigation based on inadequate information can cause confusion rather than help.